Blog
HRV
HRV stands for Heat Recovery Ventilators. For the fresh air enthusiast and modern times, these units keep a hone full of fresh air.
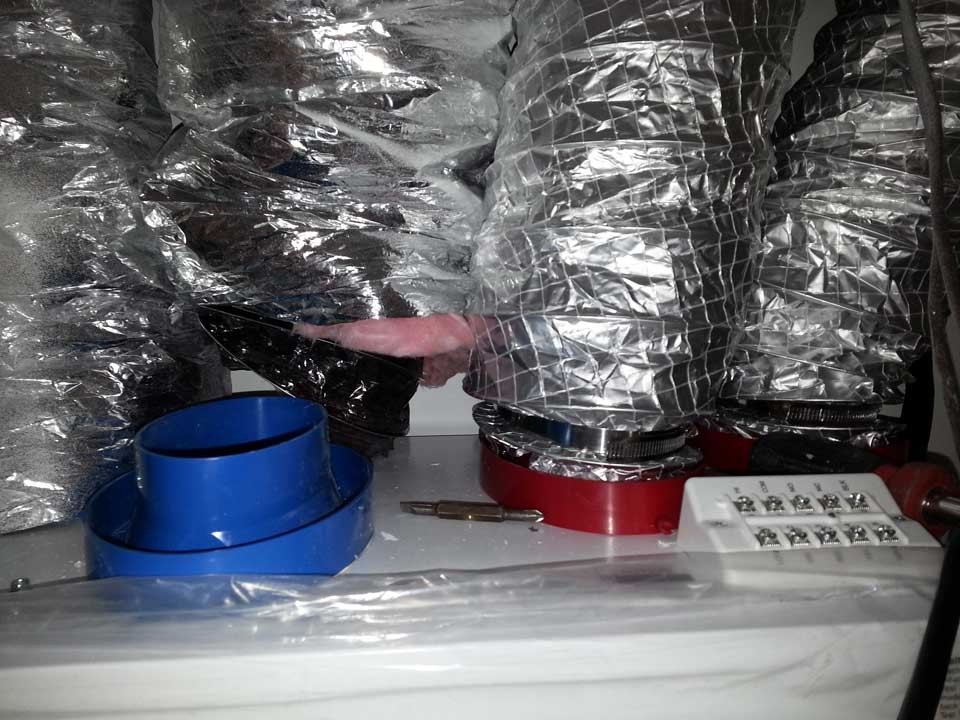
To install an HRV system, we hang it to the best ceiling studs we can find. Then, we add any reducers that are required.
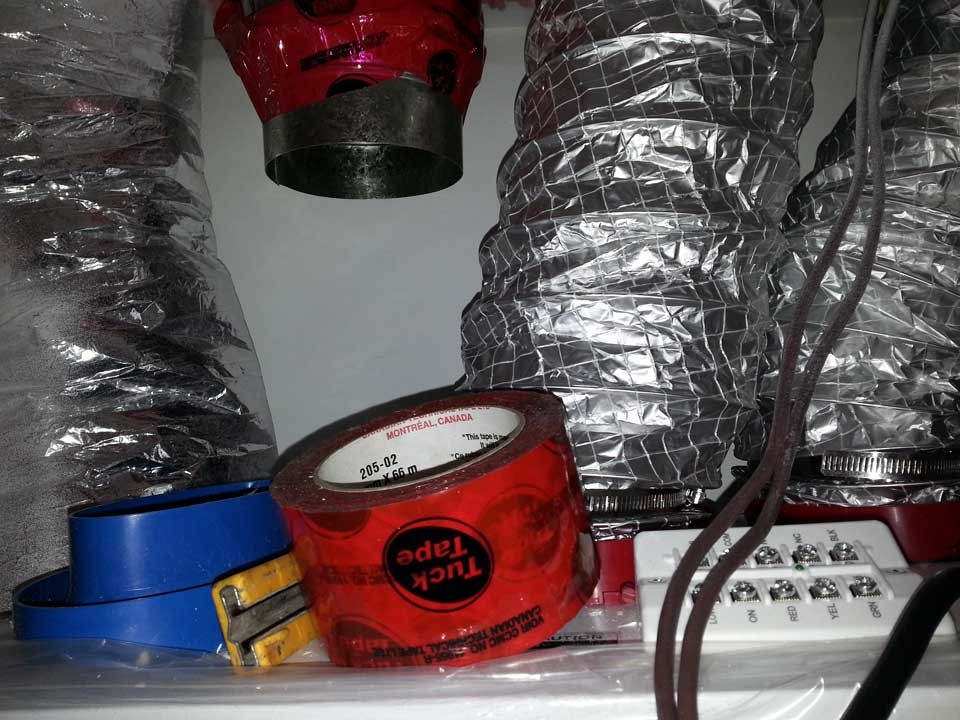
Finally, we make 4 connections; fresh air out, fresh air in, old air out and old air in. If that sounds confusing, this won't.
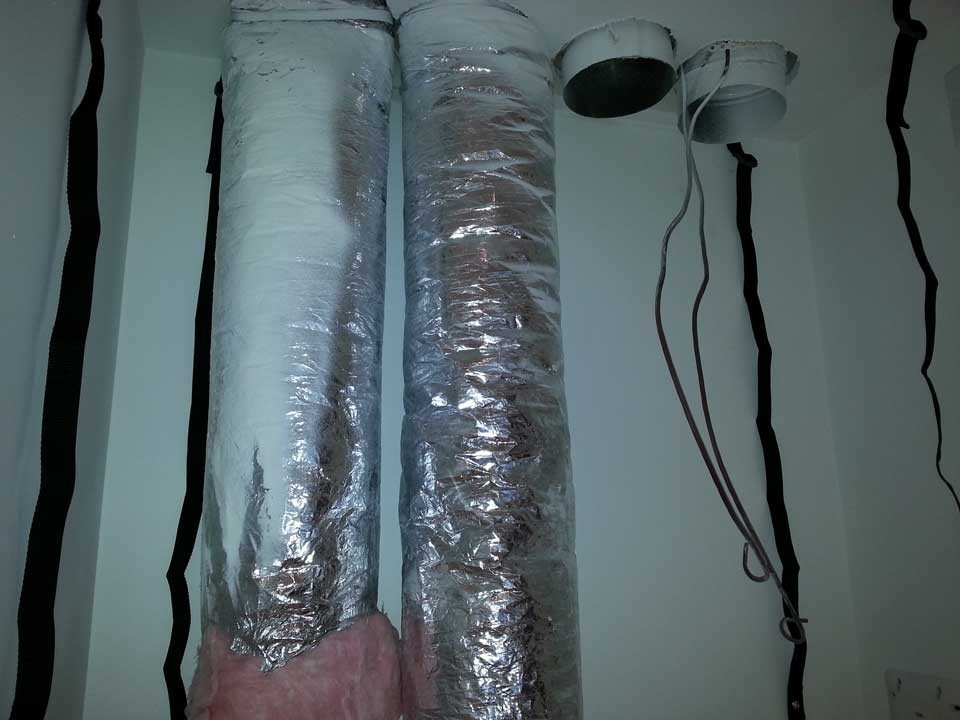
Fresh air in brings new, fresh air from outside via insulated ducting.
Fresh air out passes the fresh air we took and runs it through the house. This connection uses uninsulated duct hose
Old air out removes the old air passed through the house and sends it outside through insulated ducting. All air coming or going outside uses insulated ducting.
Old air in takes the old air from the house and passes it to the HRV unit.
Tags: No Tags
by Kent E 4 years ago 0 comments
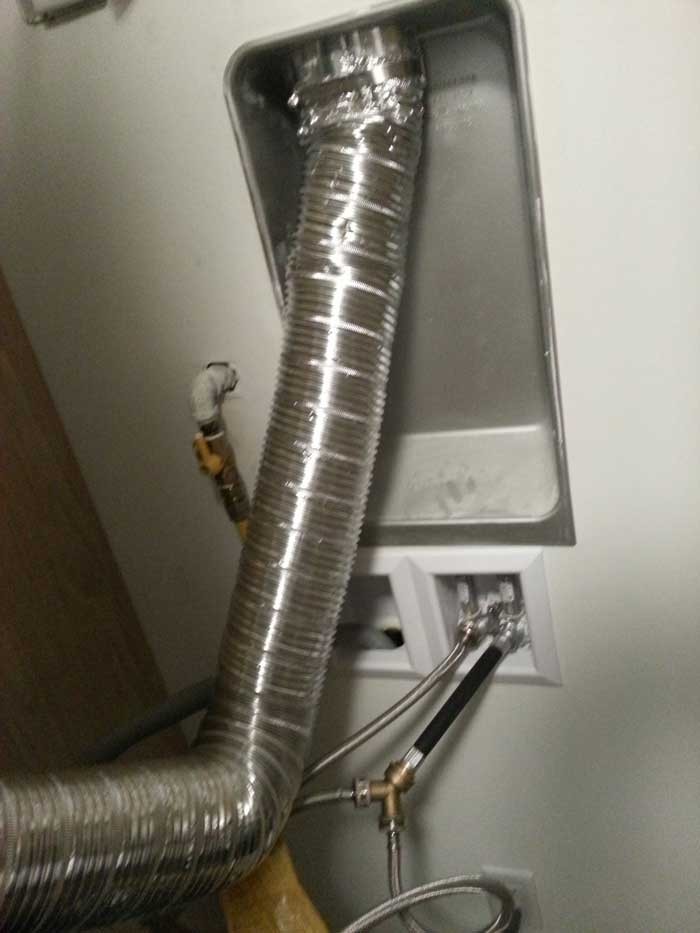
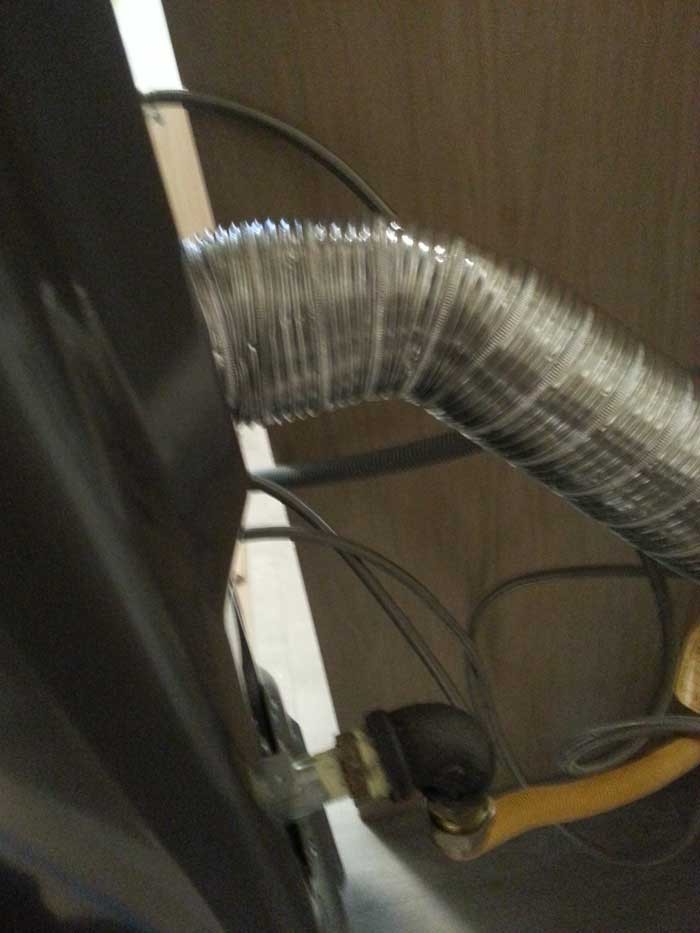
Dryers
Dryers are rather easy to connect. We use dryer flex and attach both sides. It comes in a 4-ft roll that can be extended to 10-ft if required. The problem with this stuff is that is can be messy and it is not that strong.
With that said, we connect both sides and use large gear clamps to make the connections. Once we have done that, we test and make sure no air leaks between dryer outlet and the furthest connection.
Tags: No Tags
by Kent E 4 years ago 0 comments
Bottom Mount Kitchen Sink
Many kitchen sinks, or other sinks for that matter can be done with one person. Others can be tricky and two will be the time-saving option. When doing sinks, inserting the tap first will save the nuisance of attempting to add it later when a sink is in the way. For some sinks, doing it after the sink is not that bothersome.
In our case, we will do a simple round sink. To install a sink, we hoist it up with ready rod, wing nuts, a nut, washers and a length of 2x4 with a hole cut in the middle. Once we are a couple inches from the top, we can balance it gently and apply a bead of silicon around the outer edge. We want the bead on the outside so it does not run into the finished sink, thus, leaving an undesired clean-up.

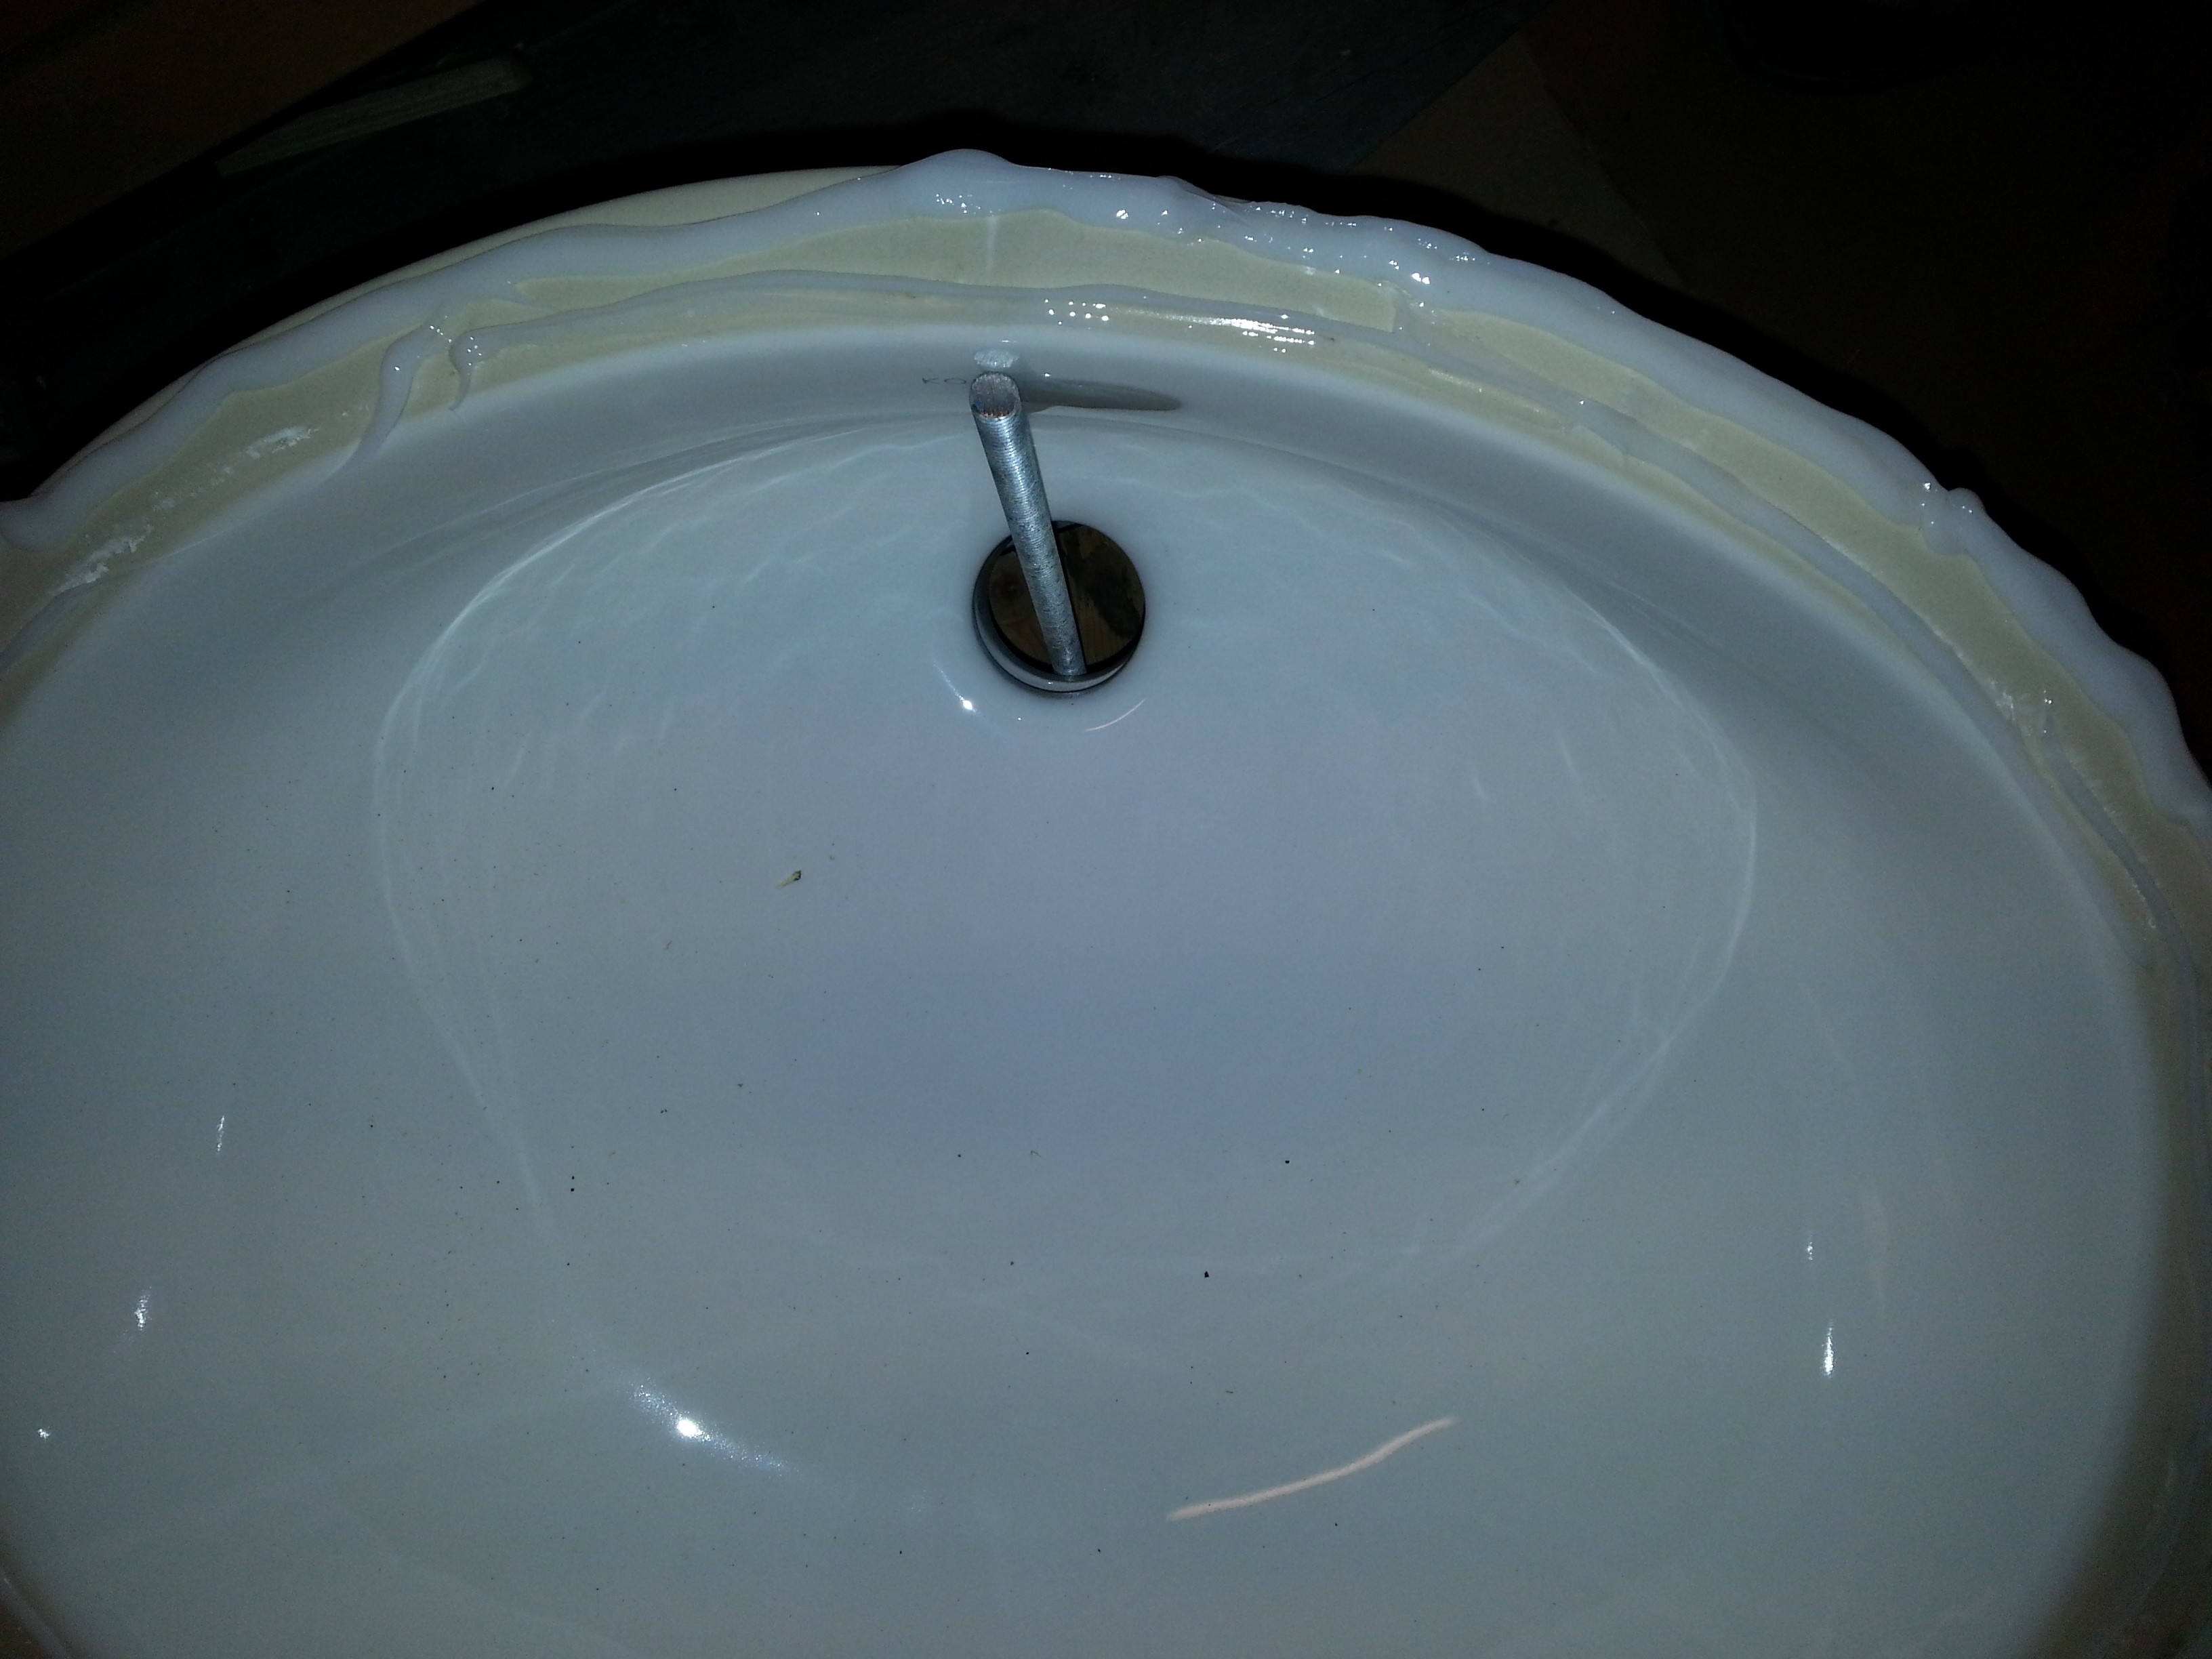
Once we are close to the top, we can use one hand and place the sink in position. We need to keep our hand on the bottom nut with ready rod so we can turn the top wingnut to make it tight.
At this point, we can use our fingers to check the distances all the way around and make sure all is even. We also want to make sure the apparatus is tight so our sink is tight against the bottom.
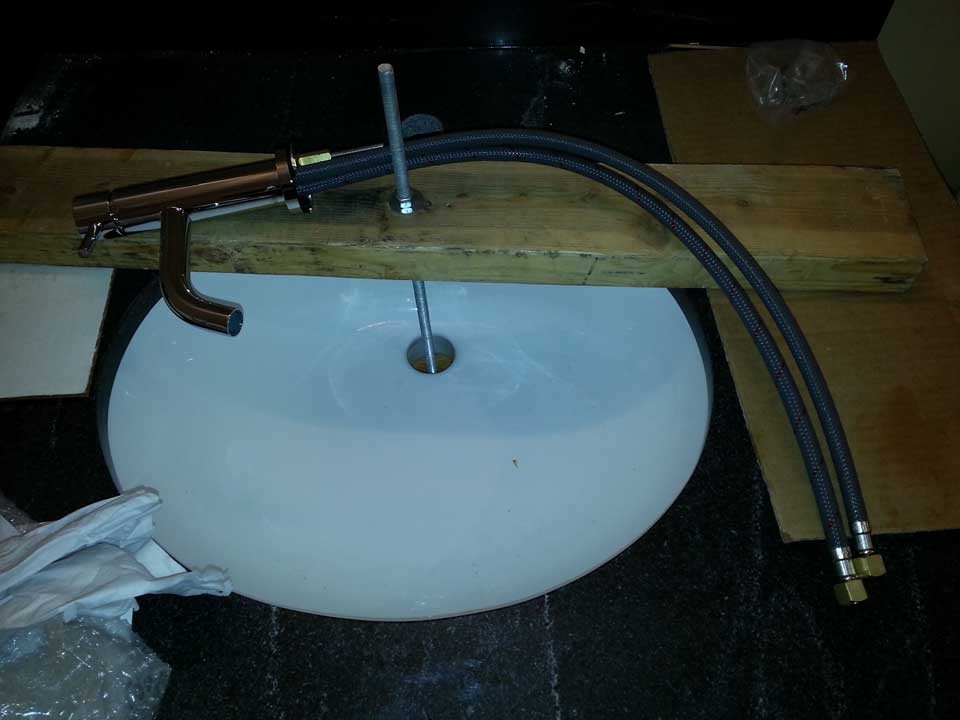

Once we have the perfect position and silicon has done some setting, we can add an extra layer of protection with all-round. When securing the all-round, we want slow action from the impactor so we don't twist it up. In addition, a good screw helps. If the all-round is a little loose, we can add another screw in the next lower hole of one of the sides.
The next steps are to add the drain assembly with a little silicon and fasten to the underside with the kit for the sink.We must be careful here because if not done right, it could leak from various sources on the bottom side. One such culprit is a poor silicon job.
After that, we connect the drainage to the trap arm and setup the water lines.

Once we are all setup, we can fill the sink and test the overflow(if exists), sink drain seal and other leaks.
Tags: No Tags
by Kent E 4 years ago 0 comments
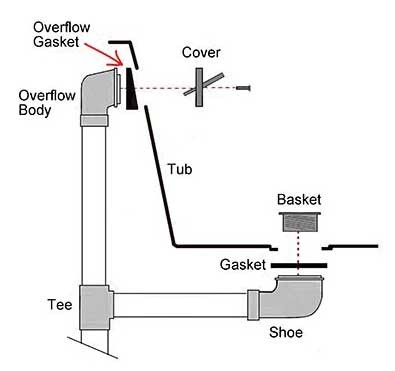
Bathtubs
New bathtubs can go real quick, or could be held up if the floor is not perfectly level. Anyways, once a team positions the tub in place and has it sitting perfectly level, we can install the drainage. The drain parts will exist on the tub floor and overflow.
Staring with the drain, we can apply a bead of silicon around the underside, trying to be careful not to drip any around the threads. After that, we can use a drain wrench to secure the bottom drain, ensuring it points directly inline with the top drain. We can dry fit a 1" piece of abs to ensure we have a good line.
Then, the top overflow is assembled. We apply silicon to the backside of the rubber gasket and secure it in place. It becomes obvious which rotation is the last one.
Now, we simply connect the drain to the overflow, which flows downwards to a trap under the tub.
Tags: No Tags
by Kent E 4 years ago 0 comments
New Toilet Flange
With a new build, or renovation for that matter, we can find ourselves in a position to install a new toilet flange. It is quite easy and usually can be completed in a few minutes(without distractions).
Procedure #1 For Wood Floor
- Cut 2x8 piece of square backing
- Glue backing and screw it place so that flange is centered in the middle according to the exact location in the building plans and cut a 4 5/8" hole with a holesaw. In some cases, we may already have a hole and need to place in top of hole and re-cut.
- Insert the flange and position it so that the t-bolts will fit inside the small grooves at the desired center. If the bolts can be closer to the ends of the small grooves, it will be stronger. However, we may have noticed flanges of more than 35 years with t-bolts smack in the middle and a slight bulge in the flange, yet, coming with a lifetime of no-leaks.
- Once the flange is in position, we can secure it with screws and 1/2-inch copper, pex rings. The rings should protrude from the outer edge of the flange. This can be done for all six holes.
For slab jobs, there is no wood backing. During a rough-in, there is 3-inch pipe that is capped up high for testing. The 3-inch pipe is cut flush, or slightly under the concrete level using a sawzall or flush cut saw.
Then, the burs are cleaned up with a knife or file, while being careful not to drop anything down the chute. After that, the flange is glued into the pipe at the desired position and stomped down on with a foot ensuring it is against the concrete.
Finally, bash pins are used to give it extra strength, even though a flange can hold up over 35 years without bash pin reinforcement.
Tags: No Tags
by Kent E 5 years ago 0 comments
Tab Widget
HRV
HRV stands for Heat Recovery Ventilators. For the fresh air enthusiast and modern times, these un...
Dryers
Dryers are rather easy to connect. We use dryer flex and attach both sides. It comes in a 4-ft ro...
Bottom Mount Kitchen Sink
Many kitchen sinks, or other sinks for that matter can be done with one person. Others can be tri...
Bathtubs
New bathtubs can go real quick, or could be held up if the floor is not perfectly level. Anyways,...
New Toilet Flange
With a new build, or renovation for that matter, we can find ourselves in a position to instal...